How to Make My Old Ugly Concrete Planters Look New Again
Disclosure: this mail may incorporate affiliate links, which means I may make a commission if you decide to make a buy through one of my links, at no cost to you.


Last year, I made an Olympic-sized (pun-intended) try to make over my dorsum one thousand.

I took downward ivy (which dumped bugs and clay in my bra), sawed down branches, pulled out weeds longer than my arm, built a argue, constitute an entire toy store's worth of balls and frisbees , and fifty-fifty dressed up my tiny patio with some new outdoor chairs and a couple planters. There was merely one problem:
My concrete slab patio is complete garbage.

It's non really the slab's error; it'due south mine. I ofttimes work on projects on my own, slowly, and in that location are merely never enough hours in the day, muscles in my back, and patience in my body to get it all done as quickly as I can visualize in my mind. Thus, this fiddling patio paid the price from neglect and was now begging for help. And then when Olympic asked me to review their Rescue It! deck and physical resurfacer , I figured I give it a try. After all, anything is ameliorate than this!

I must acknowledge, I was a picayune nervous about trying out an outdoor paint projection on physical. While I accept had plenty of do with paint, I don't paint a lot of things that are left exterior. Outdoor products have to withstand a multitude of issues, and paint can chip and peel when temperature and moisture creep into the surface. But the promises of Rescue Information technology! seemed , well, promising: with the proper grooming, I could get a like-new patio that would also withstand the elements and fill in cracks… which might even assistance the patio not expect like this once more in the futurity.
What Y'all'll Need:
- Olympic Premium Deck Cleaner
- Garden style pump sprayer (I used a 1-gallon size with a high-book tip)
- Stiff bristle broom
- Pressure level washer
- Concrete caulk or patching compound
- Olympic Rescue Information technology! Resurfacer (measure out out your surface expanse and make sure you lot've got enough to do two coats… you need more than you think!)
- 3″ castor
- i/2″ nap roller
- Roller tray
- Extension pole
- A weather forecast that really cares well-nigh getting your projects done on time
Colors
I was somewhat impressed with the extensive color selection, but wasn't thrilled at how tiny the take-dwelling swatches are (it's tougher to be certain you're picking out the right colour). Subsequently having painted the slab in front end of the house with paint once earlier, I knew how hard finding the perfect "freshly poured cement" color would exist. Grays are usually as well blue, so it's better to steer toward grays with lots of brown in them. Now that I've lived with the front slab gray color for a while, I knew I wanted something slightly darker and with a piffling more brown in itfor the dorsum yard. Heritage Grayness was my answer.

#Prepmatters
To do this project, it's important to recollect to properly prep the surface. Really. I'm all for skipping steps when and if you lot can – but in this case, to go this product to stick for the long booty, yous need to follow all of the directions (which are downloadable, here).

Beginning, castor off any loose debris from the patio and fill up the pump sprayer with deck cleaner. The patio should be completely dry out when you spray, and you'll demand to spray the solution at full concentration (this surprised me, as well-nigh cleaners like this are usually mixed with water). Even without scrubbing, you lot will meet a noticeable difference in a thing of minutes.

Don't be surprised if you see some white buildup as the cleaner starts to have effect. Since you're outside, you won't accept to worry too much about ventilation, simply this cleaner southmells somewhat bleachy – and then be sure to article of clothing suitable wearable and heart protection and avoid sticking your nose directly into the canteen (or in layman'southward terms, "animate in the fumes").

If you think your patio is especially gross (similar mine), use a strong broom to assistance evenly distribute the cleaner and scrub off whatever algae. I was pretty impressed with the difference I could see in the physical already; just look at that colour modify!

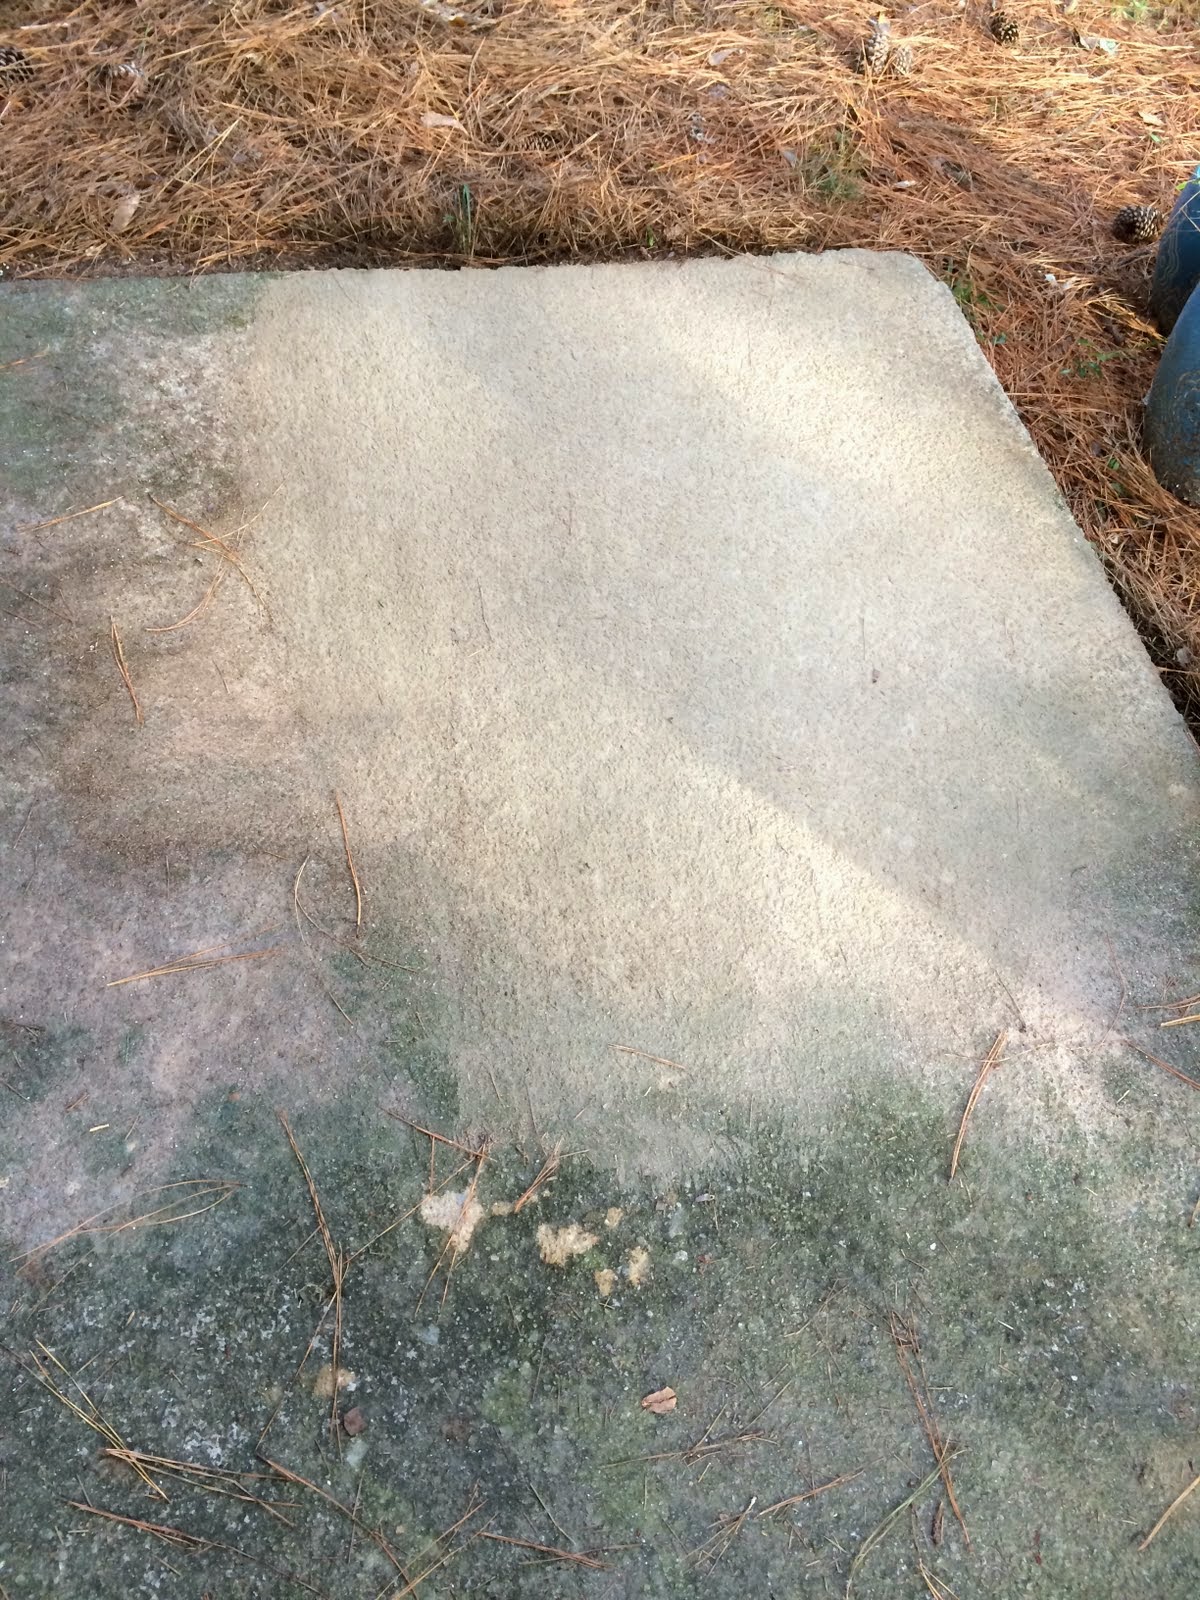
Adjacent, hose everything off. A pressure washer works all-time to clear off any loose clay (since my patio is level with the ground, hosing things off simply correct so as to not wash dirt dorsum onto the patio proved to exist a picayune bit of a challenge). I borrowed my Dad's pressure washer and had a LOT of fun. Allow the patio to dry, but repeat the cleaning stride as many times equally needed. I ran out of cleaning solution before I could fully cover the patio a 2d time, and then I would recommend getting more cleaner than you think you'll demand (the bottle says upward to 300 sq. ft , but my patio is only 80, and it didn't fully comprehend it a 2d time). You'll want the surface to be every bit clean as possible to get the product to stick.

Fill in whatsoever cracks or gaps that are larger than 1/iv″ and allow dry. Allow the surface to dry for at least 24 hours earlier moving on to painting.

Weather
Ane caveat that I ran into when doing this projection: betwixt needing the surface to be dry out before cleaning, to allow proper dry time earlier painting, and enough cure fourth dimension afterward, you lot need a minimum of four dry out days in a row to complete this project. Sure, you could exercise the cleaning office and then a small-scale gap in the middle for pigment if the surface can stay clean, but it probable means prepping the surface again, which means more dry time. Originally, I was hoping to do this projection at the commencement of October, but the forecast predicted rain every few days all calendar month. I was happy for pelting, but I found the property blueprint a lilliputian frustrating, especially since the weather condition was going to cool downwardly presently. This product is also sensitive to temperature (it needs to stay nether 90 and above 50 degrees during awarding), so my overall recommendation is to do this project in the tardily jump or early on summer when the weather tends to be drier and warmer.
Awarding
To begin painting, take your brush and work the paint along all of the edges of your patio. If you run across a small imperfection or crack, use a brusque dabbing stroke to work the paint in, and then brush over to smooth things out.

The pigment pretty much goes on like any other; it'south just a lot thicker and a petty grainy (the texture in the pigment supposedly helps the surface from condign slippery underfoot). If you take to expect a few days from a rain delay like I did, take the paint back to the store to have it shaken up again (the texture will settle and it's hard to stir). As you lot apply the pigment, be sure to keep any debris off (the surrounding pine trees that blanket my yard kept trying to sabotage my progress).

Because of the stippling to make full in small holes and such, I wouldn't necessarily phone call this project quick (I lost track of time, simply it was hands an hour or two with the stippling and back brushing), just the extension pole helps things go a LOT faster once things are filled in.

As ever, the projection supervisor watched, just did not endeavour to help.

Important: for waterproofing reasons, make sure you do two coats (it helps prevent water from getting underneath and causing peeling). Afterward the first ane goes down, you can recoat in 6 hours. Mine looked pretty great later i, and so I was tempted to call it a 24-hour interval, only after applying the 2d, I could run into how the next coat filled in areas that the beginning did not.

Allow the concluding coat to dry for at least 48 hours before foot traffic, and 72 hours before putting article of furniture or potted plants back on it. I found that information technology stale much faster than this, but I'yard staying off of it until the required days are over, salvage for the occasional sweep to keep pine straw from making themselves at home.

Before & Later on
Now is the fun part. Earlier: grimy, algae-covered, mess of a patio. And after: no more than grime!

Price:
(Olympic provided me with the deck cleaner and resurfacer products for this project, but I still wanted to do the math in case you decide to buy it yourself.)
- Deck cleaner – $7.98
- Rescue It! Resurfacer – 49.99 ($99.98 for the 3-gallon container I had, but I still take nearly half left over to paint the front slab)
- Pump sprayer: $14.97
- ane/2″ nap roller: $3.98
- three″ nylon brush: $3.98
- All other materials: already owned (renting a power washer will likely set you back in the $50-75 range to hire for a 24-hour interval)
- TOTAL Cost (w/o tax) : $80.xc


Oh, and one more groovy large pro: I'm posting a giveaway tomorrow morning for y'all to win your own #PrepMatters kit! This volition include both the cleaner, the pigment, and at $25 gift menu to purchase your other supplies. Then exist sure to come up back in the morning to check it out (or if you're reading this at work on Fri morning, go ahead and bank check to meet if at that place's a new post up for the giveaway already launched!).
![]()
Source: https://www.uglyducklinghouse.com/make-patio-look-new-olympic-rescue-it/
0 Response to "How to Make My Old Ugly Concrete Planters Look New Again"
Post a Comment